Overview
Learn how to connect the GTJ Chrome extension to Jira.
Quick Steps
| Expand |
|---|
|
- Click on the GTJ Chrome extension icon from Gmail, Google Drive or Calendar
- Select any option and this screen will appear
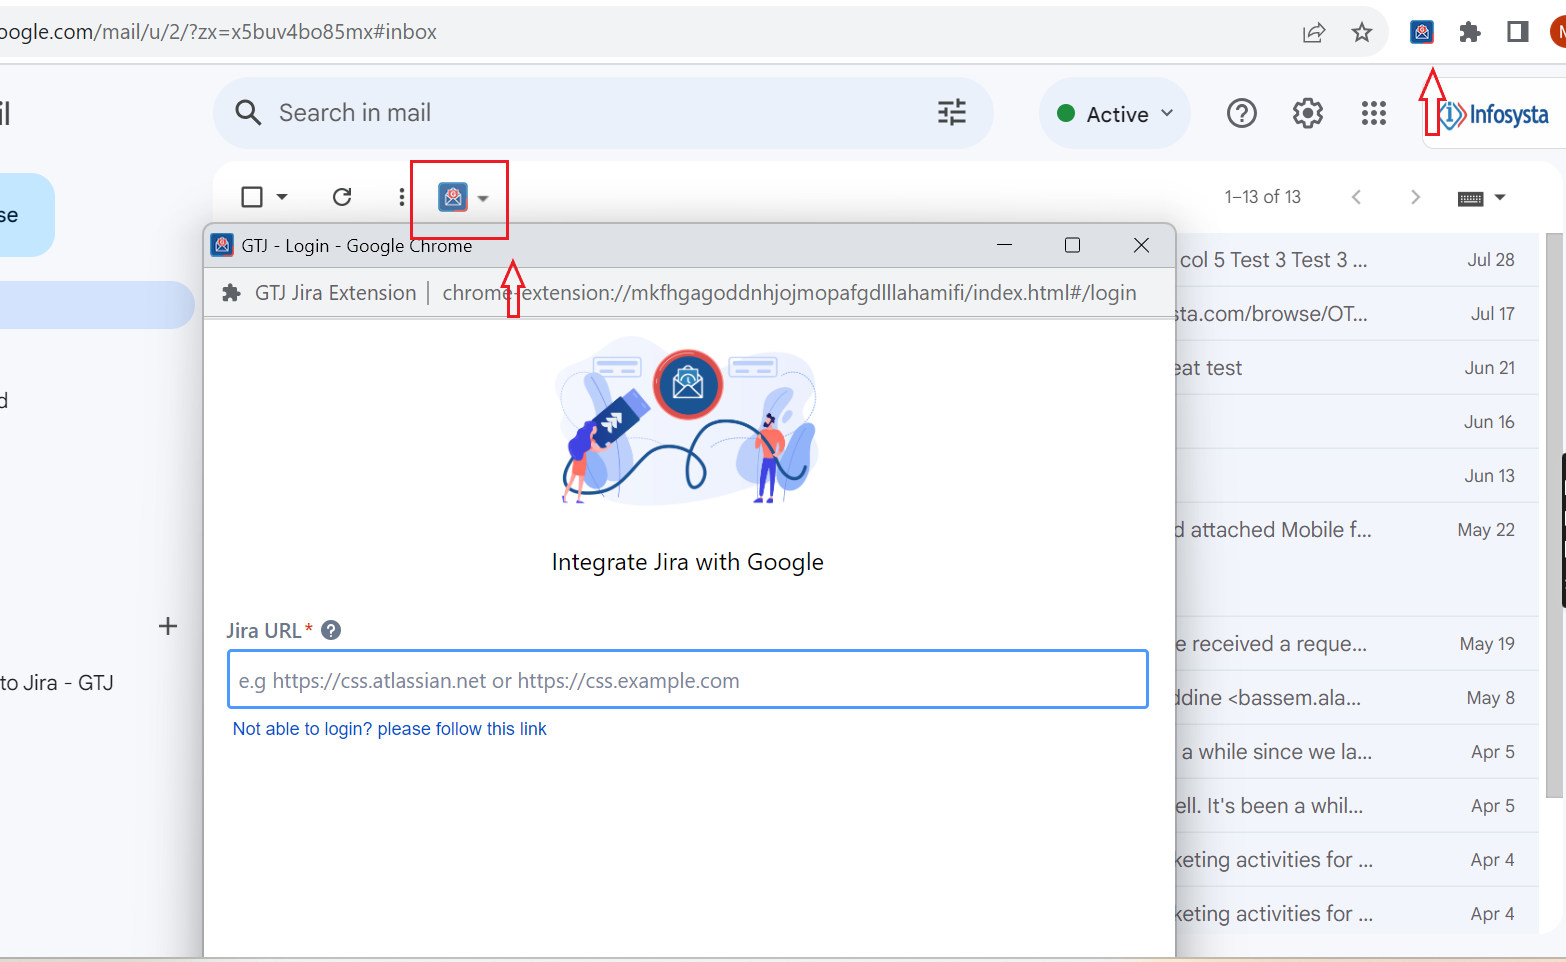
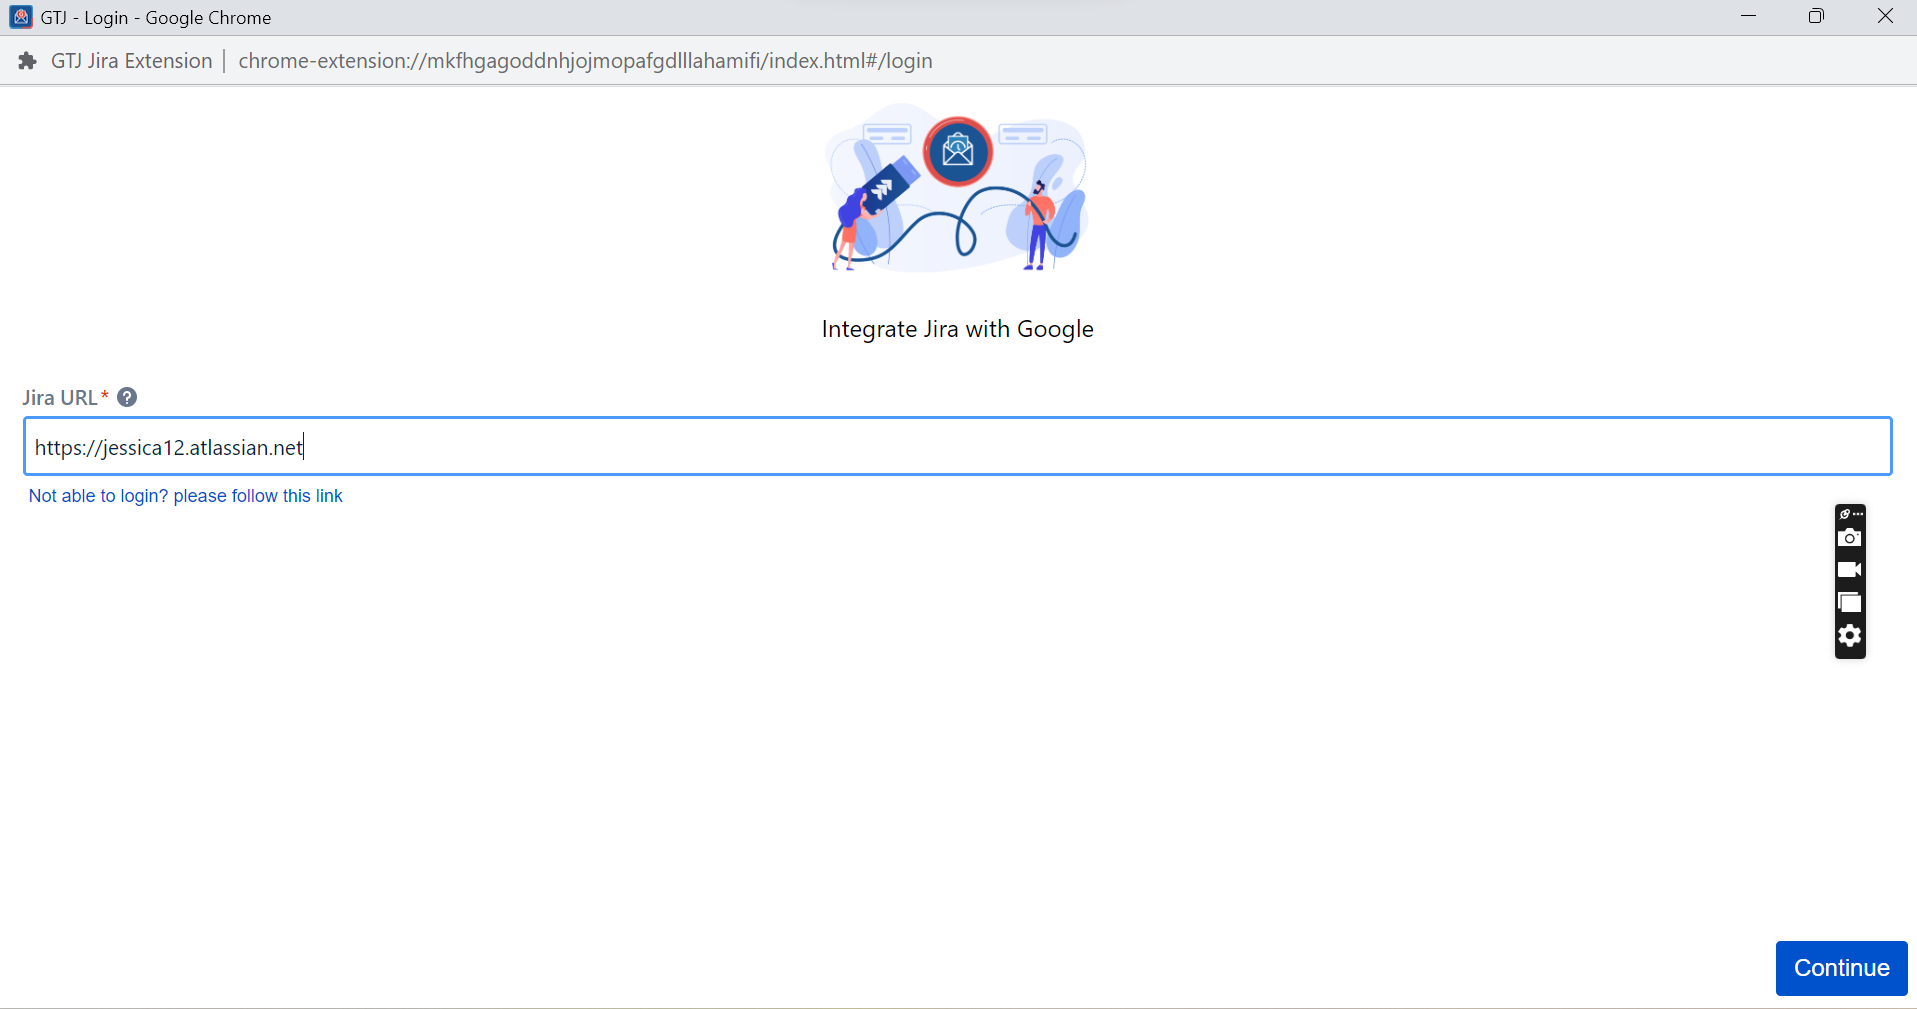
- Enter your Jira Cloud instance URL, then click on Next
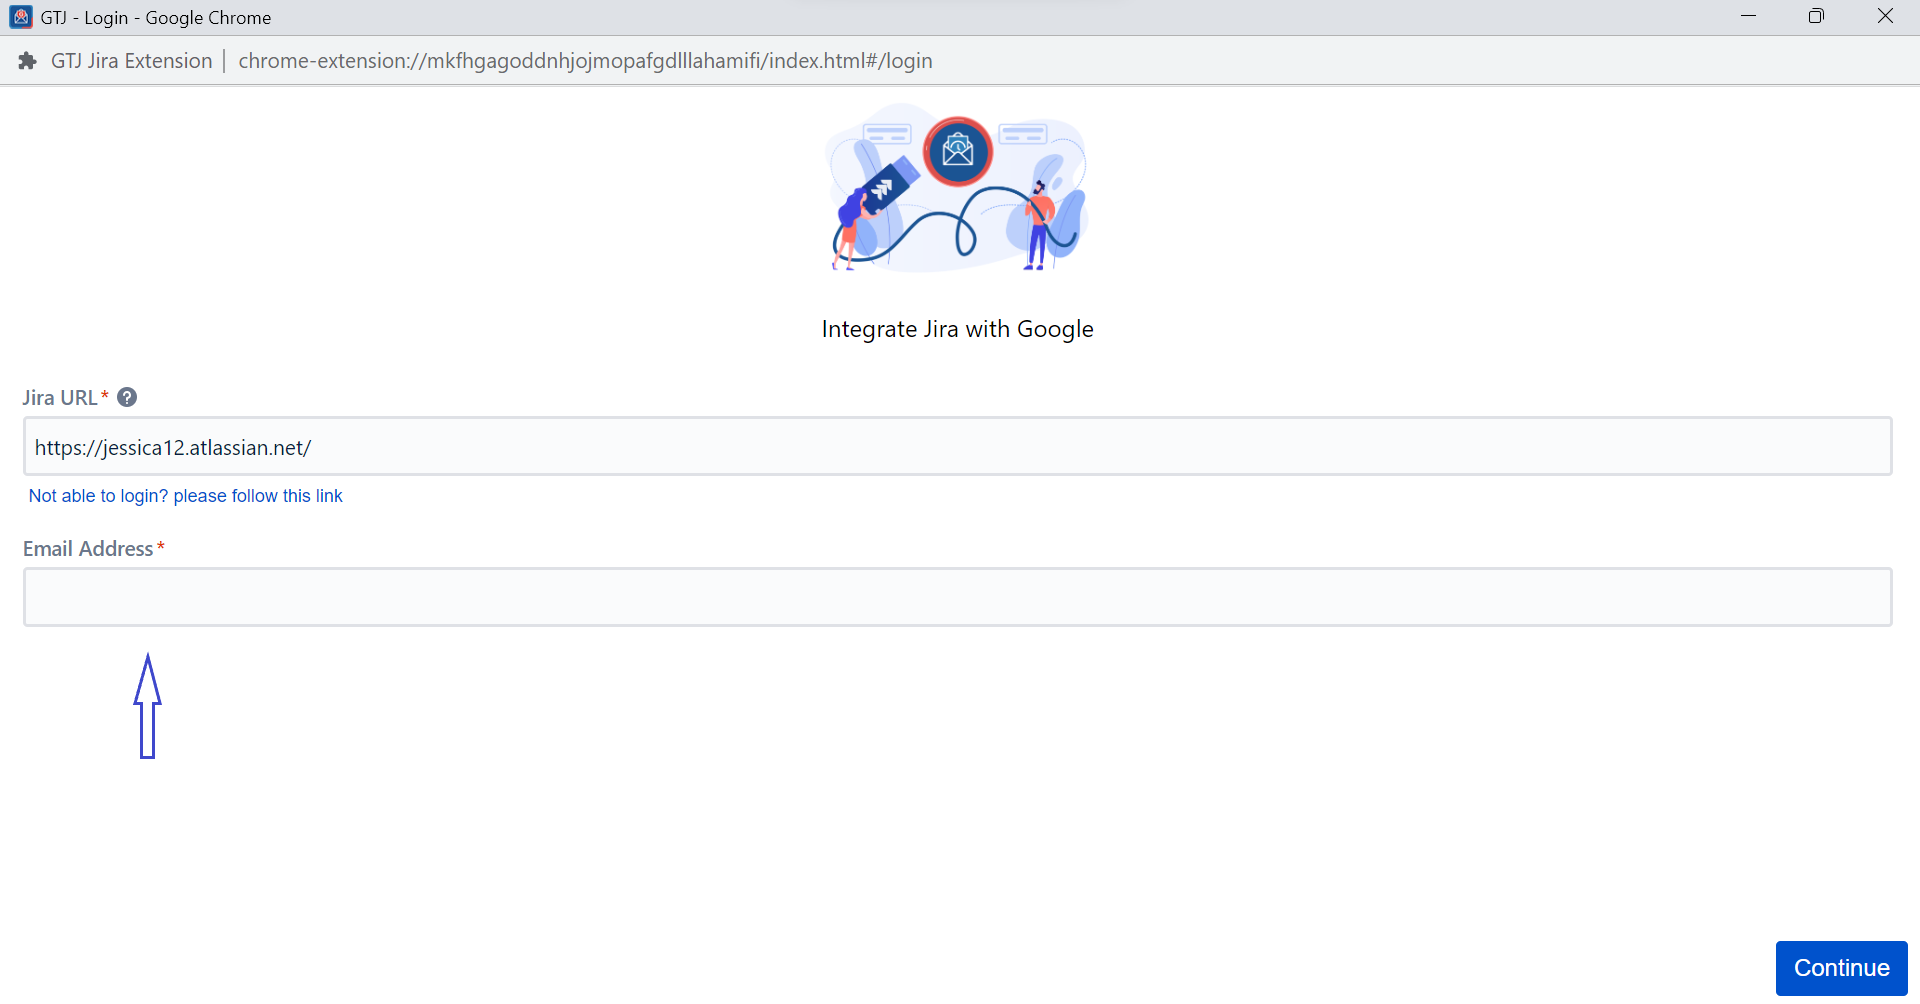
- Enter you email address and click on Next
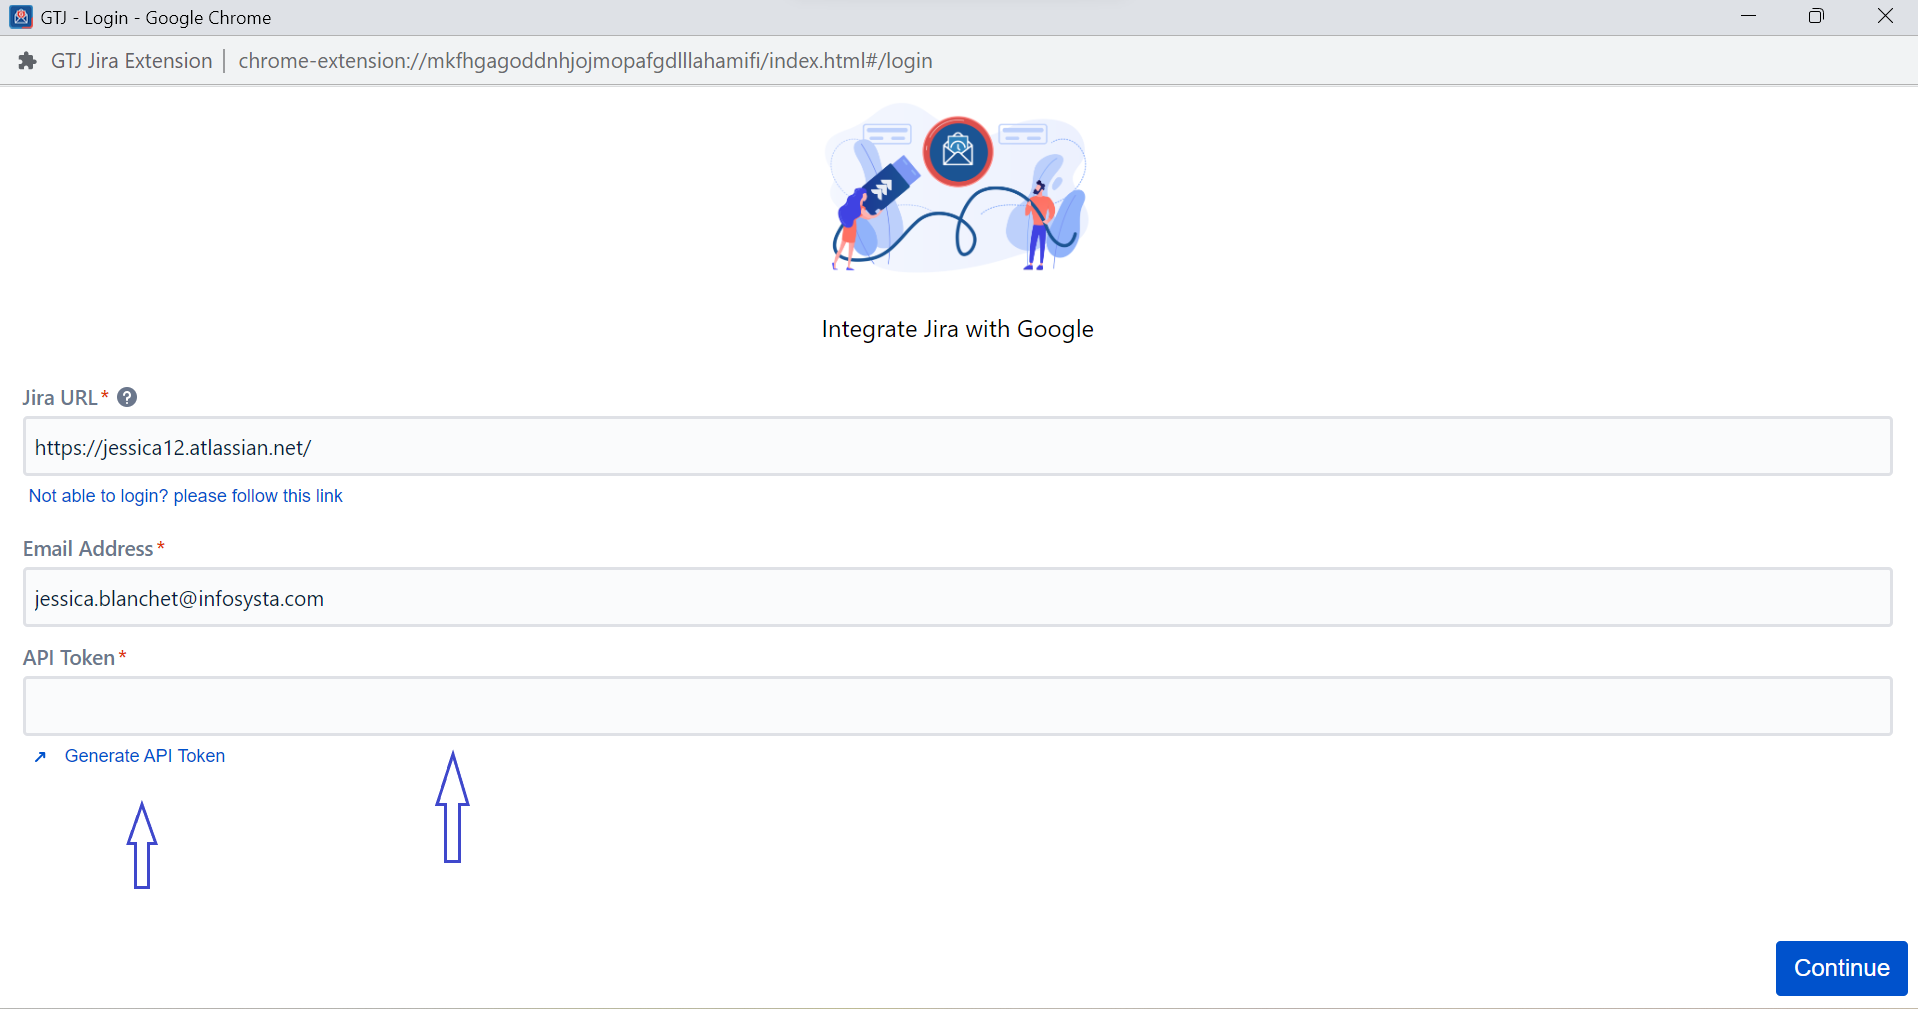
- Enter your API Token, or click on Generate API Token to get a new one
- Click on the Login button
 | Tip |
|---|
Great, you are now connected to Jira and ready to explore GTJ's features! |
|
| Expand |
|---|
|
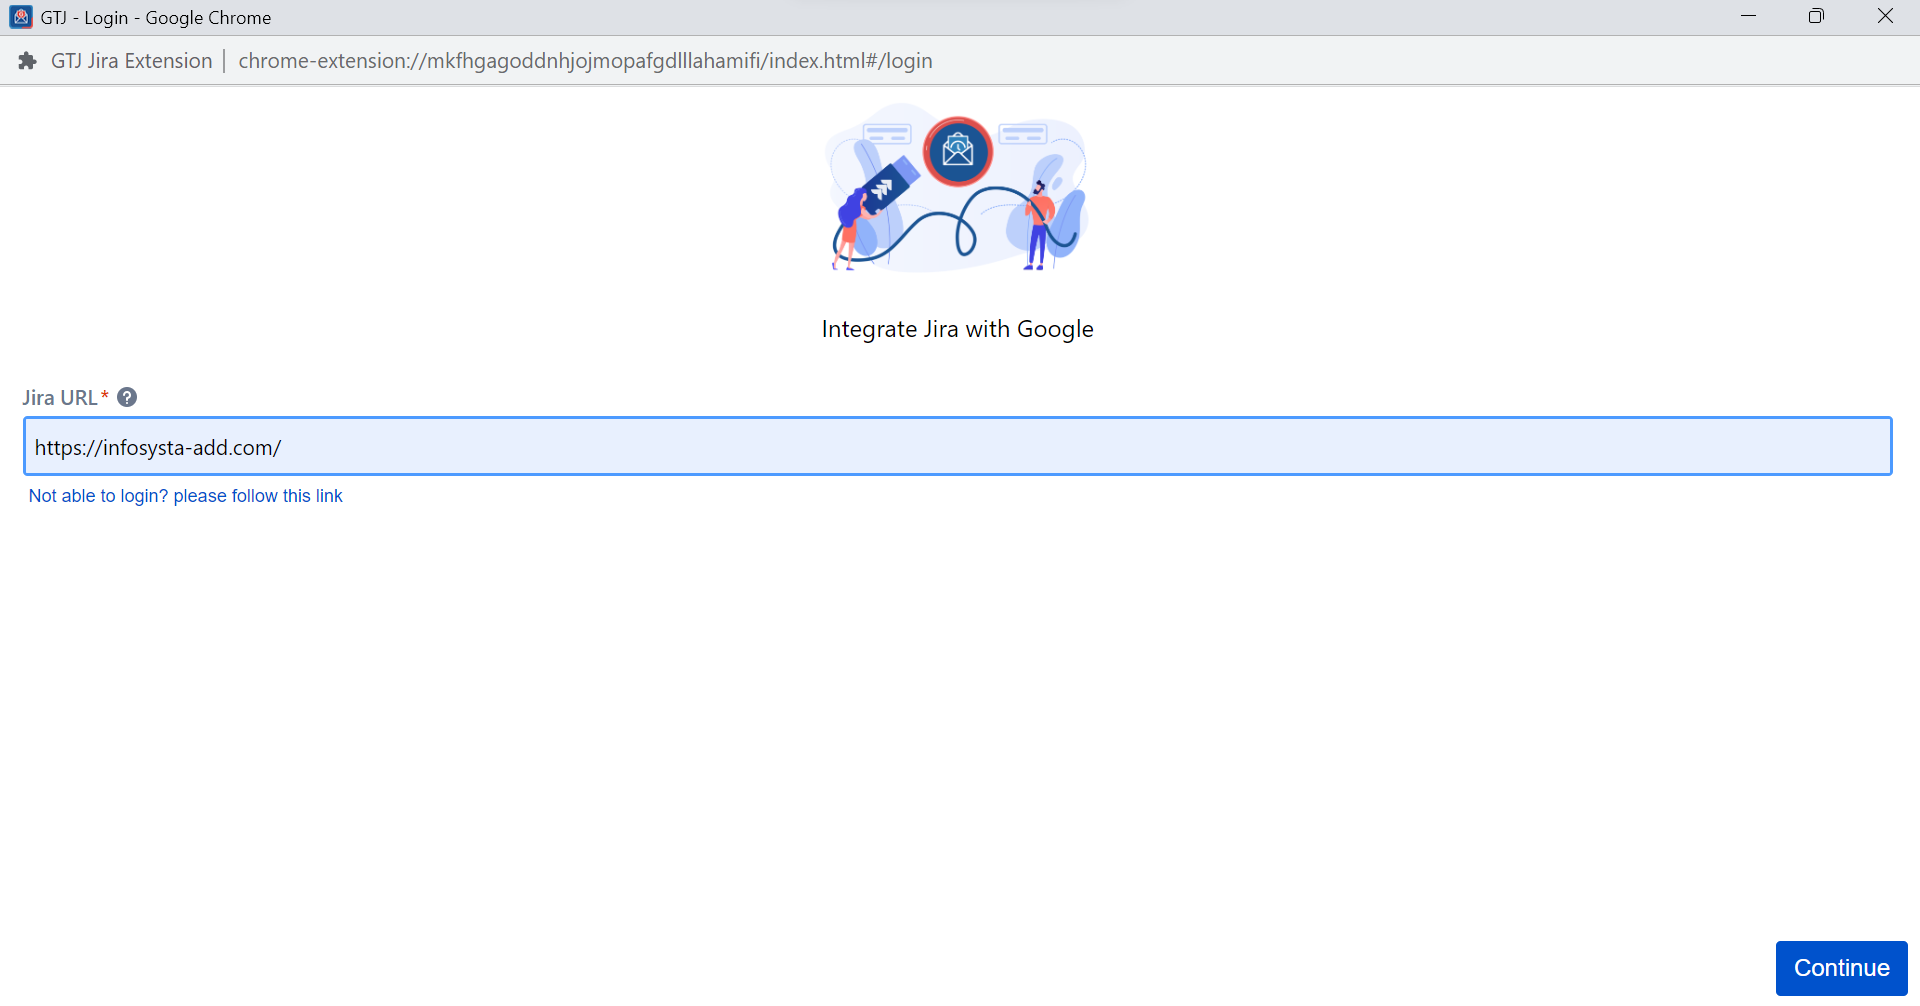
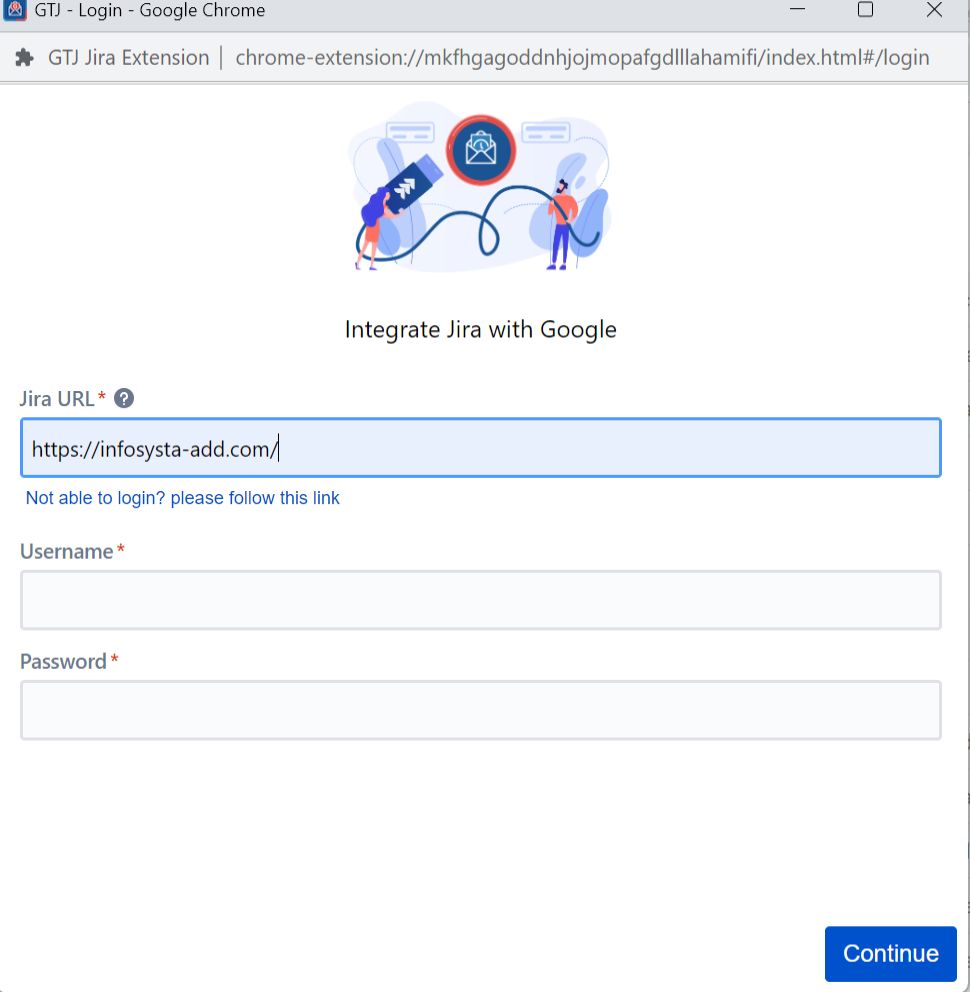
- Click on the GTJ Chrome extension icon from Gmail, Google Drive or Calendar
- Select any option and this screen will appear

- Enter your Jira Server URL
- Click on Continue
- You'll be Prompted to continue as Agent or Customer
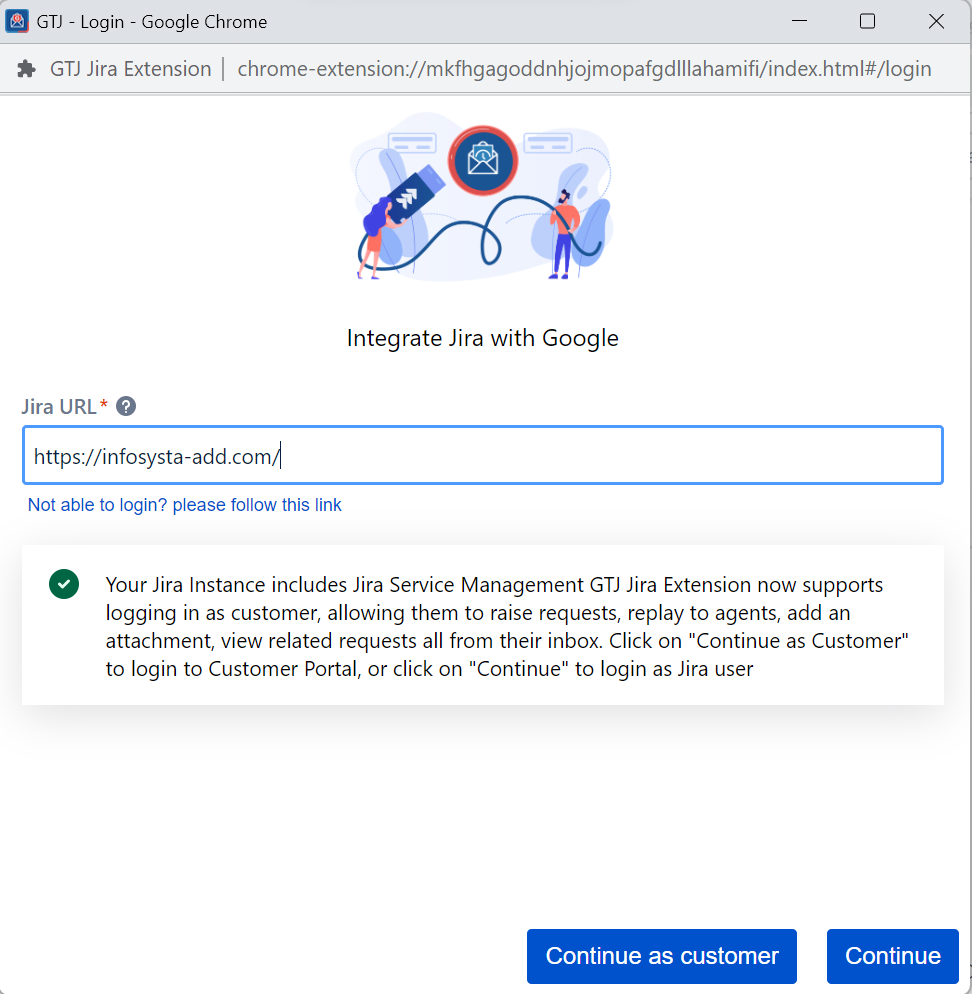
- You'll be redirected to the following page
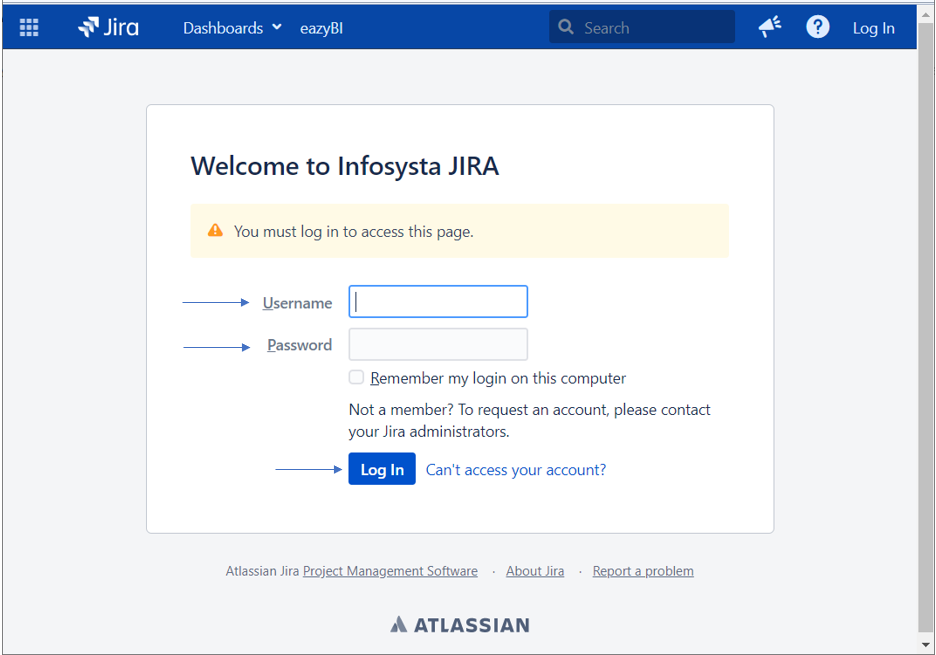
- Enter your Username and Password
Click on Login | Info |
|---|
To be redirected to the following OAuth 1.0 login screen, Application link should be configured in your Jira admin side. To configure your application link follow this guide. |
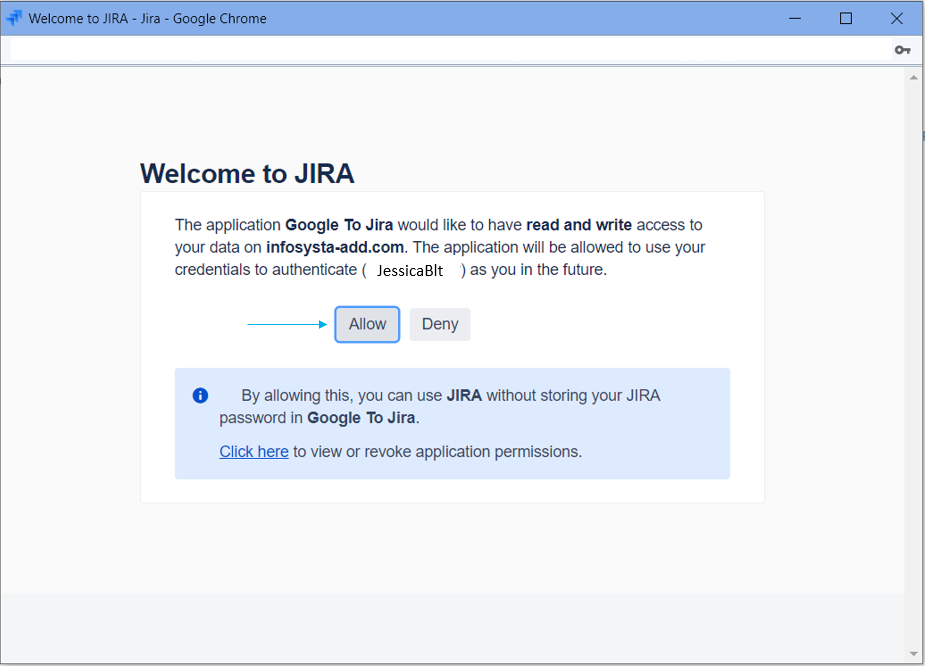 - If you click on Deny; you'll be redirected to the basic login screen
| Info |
|---|
If Application link isn't configured in your Jira admin side OR you clicked on Continue as Customer, you'll be redirected to the basic login. |
Basic Login - Once you're redirected to the following basic login page
- Enter your Username and Password
- Click on Login
 | Tip |
|---|
Great, you are now connected to Jira and ready to explore GTJ's features! |
|
| Content by Label |
|---|
| showLabels | false |
|---|
| title | Related Content |
|---|
| excludeCurrent | true |
|---|
| cql | label = "add-gtj-chromeextension-admin" |
|---|
|