Overview
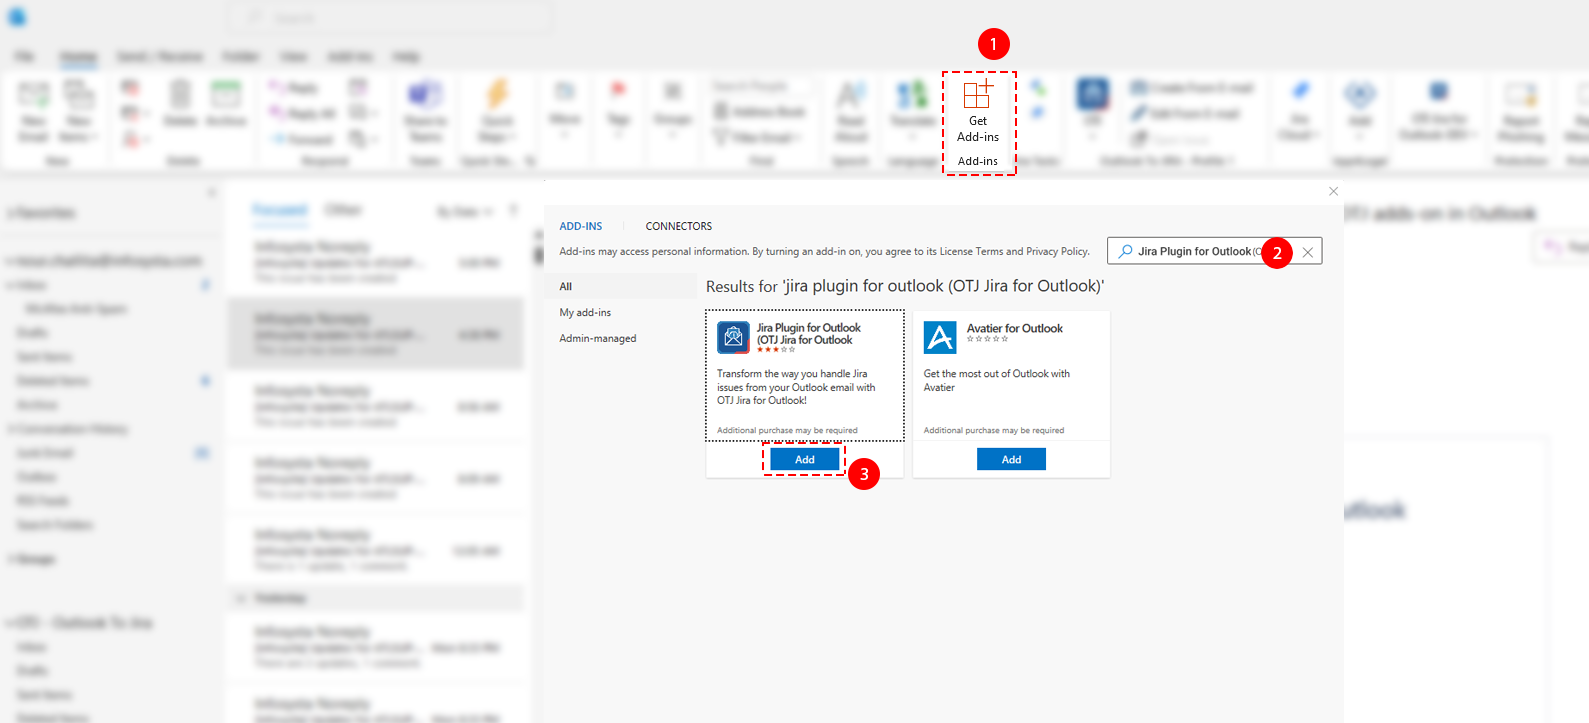
To get started, you first need to add Jira Plugin for Outlook add-in to your Outlook.
Quick Steps
| Step # | Action |
|---|---|
| 1 | Click on Get Add-ins |
| 2 | Search for Jira Plugin for Outlook |
| 3 | Click on Add button |
| 4 | You have successfully added the app, the next step is to activate your license |
You can now browse the app as a guest, but you will need to activate your license to be able to create tickets and make use of the features of 'Microsoft Outlook for Jira'.
If the add-on doesn't show in Outlook, please restart Outlook and try again.
Additional Links:
- If your admin already added the app from the marketplace, you can skip the second step and continue from here, to connect and login.
- If Microsoft Outlook for Jira is already set-up and connected to your Jira instance, skip to our user guide.
Related Content
-
How to Activate the License for 'Microsoft Outlook for Jira' (Microsoft Outlook for Jira)
-
How to Link 'Microsoft Outlook for Jira' to Jira (Microsoft Outlook for Jira)
-
How to Check the Validity of the 'Microsoft Outlook for Jira' License (Microsoft Outlook for Jira)
