Feature Overview
In this guide, you will learn how you can tag all the emails you have created a Jira issue from, to keep track of them, and how you will be notified when the ticket is created from a certain email.
Quick Steps
You can disable this feature whenever you would like from the settings screen.
Step # | Action |
|---|---|
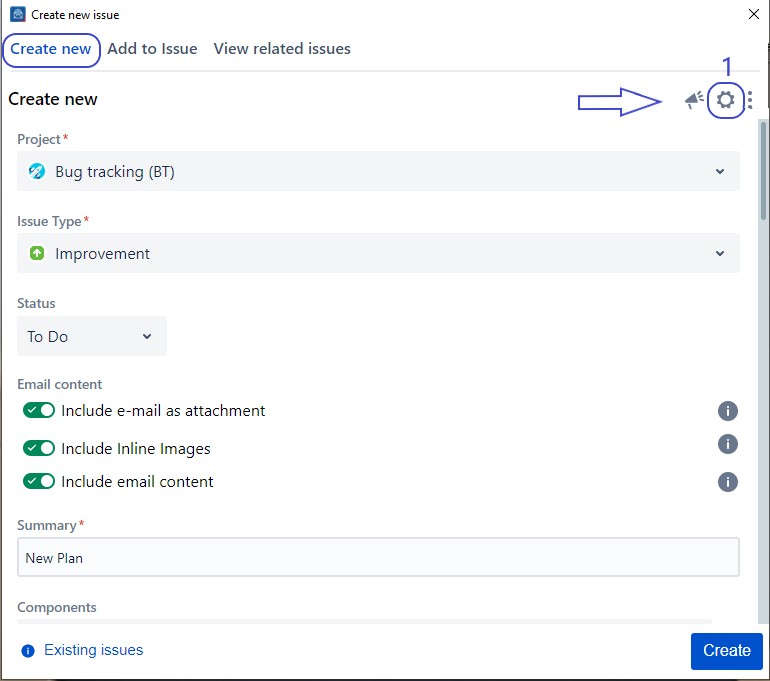
| 1 | Go to Setting Screen |
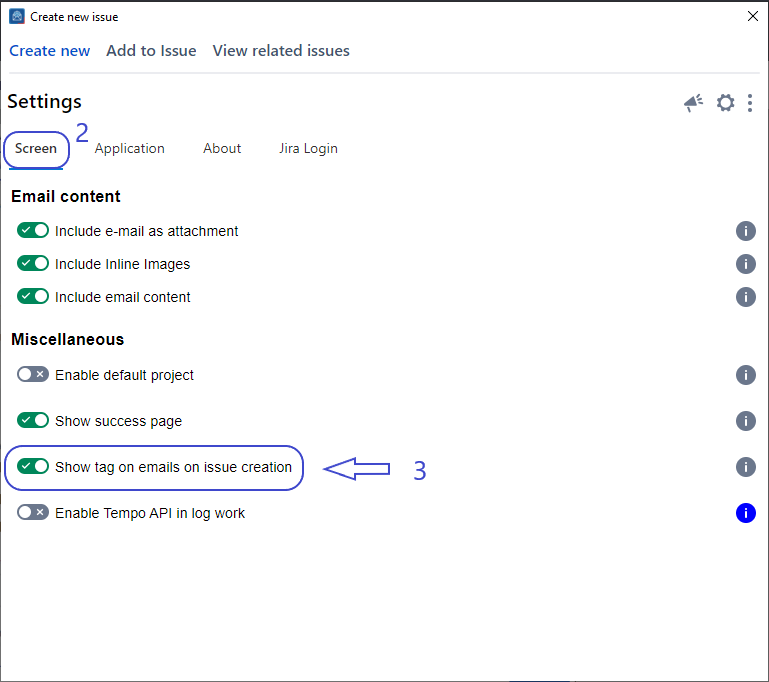
| 2 | In the Screen Tab → Check the 'Show tag on emails on issue creation' toggle to enable this feature |
| 3 | Go to the Create Screen and Create an Issue |
| 4 | Now after creating an issue, you'll be able to see the notification and the category tag |
Detailed Steps
- Go to Setting Screen
- In the Screen Tab → Check the 'Show tag on emails on issue creation' toggle
- Go to the Create Screen, and Create an Issue
- After this, you can check the notification and the category tag as shown below

Related Content
-
Core - How to Enable Tempo API to Log Work (Microsoft Outlook for Jira)
-
Core - How to Enable/Disable Tagging Emails when Creating Issue (Microsoft Outlook for Jira)
-
Core - How to Set a Default Project and Issue Type (Microsoft Outlook for Jira)
-
Core - How to Customize Which Email Information to Include (Microsoft Outlook for Jira)
-
Core - How to Create a New Component (Microsoft Outlook for Jira)
-
Core - How to Show/Hide Fields (Microsoft Outlook for Jira)
-
Core - How to Create a New Fix Version (Microsoft Outlook for Jira)
-
Core - How to Link Issues from the Create Screen (Microsoft Outlook for Jira)
-
Core - How to Create a Subtask (Microsoft Outlook for Jira)
-
Core - How to Log Work from the Create Screen (Microsoft Outlook for Jira)
-
Core - How to Create New Jira Issues from Microsoft Outlook for Jira (Microsoft Outlook for Jira)
-
Core - How to Create a New Customer in a Service Desk Project (Microsoft Outlook for Jira)
-
Core - How to Preview Attachments (Microsoft Outlook for Jira)
-
Core - How to Rename Attachments (Microsoft Outlook for Jira)
-
Core - How to Mention User in description (Microsoft Outlook for Jira)